Building a rich e-commerce experience on the Jamstack with TakeShape, Shopify, and Next.js
Using the TakeShape Mesh, we can combine our products and content to create a rich shopping experience that goes beyond your typical store templates.
I want you to picture an online store. What do you see? Maybe a hero image, a grid of products, or — sigh — a carousel. So many e-commerce sites look the same since they're using the same pre-made templates and solutions. They're easy to set up, but they also don't inspire. Let's change that!
In this guide we're going to break free of Shopify's limits and build a unique, content-driven e-commerce experience with Shopify, TakeShape and Next.js. By connecting Shopify and TakeShape, we can extend our e-commerce backend with all different kinds of data. Then, by querying TakeShape from Next.js, we can easily generate a static static from React components. Taken together, it's the best way to create a one-of-a-kind storefront on the Jamstack.
Now…what should we build?
Let's build a lookbook
Lookbooks are a powerful tool for e-commerce, since they help customers imagine our products in context. They're closer to a fashion magazine than a mail-order catalog, allowing our brand to tell a story and strike a mood. They can also show off multiple products at once, making them a powerful tool for increasing sales.
For example, Uniqlo's lookbook provides an alternate way to browse their different products based on what catches our eye. If we click on any photo, we'll be able to see the specific products the model is wearing.
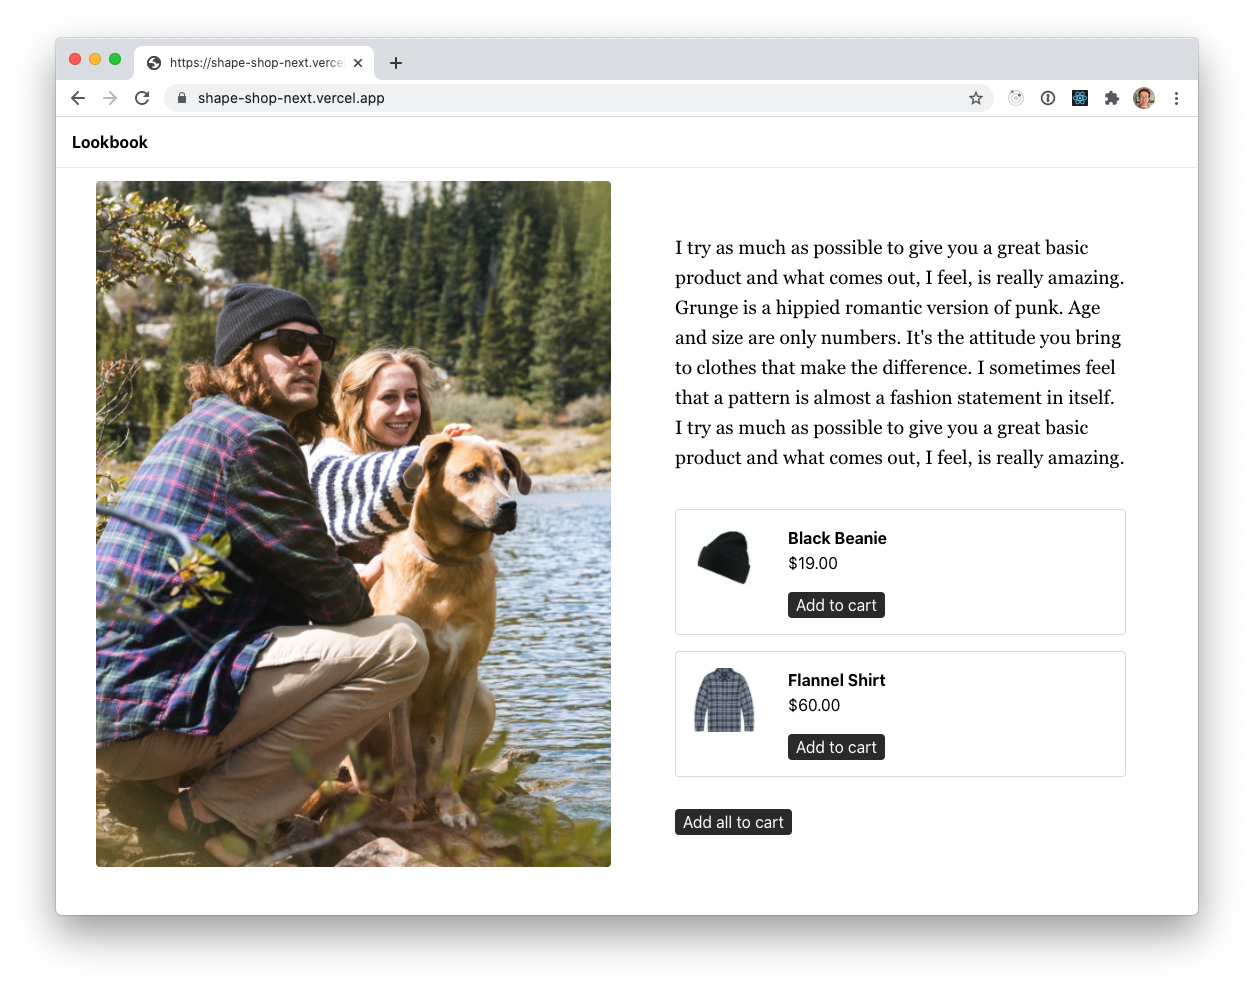
This would be tricky to build just in Shopify, since it is really geared around rendering one product at a time. Connecting Shopify with TakeShape makes it easy to associate specific products with content, then query the combined data with GraphQL. By building our storefront with Next.js and deploying to Vercel, we can quickly deploy a fast, inexpensive storefront that's built in React. In the end, we'll combine all these tools' strengths and end up with a one-of-a-kind Jamstack storefront. This is what it'll look like:
Let's get building!
Create a custom e-commerce API with TakeShape and Shopify
If you'd like to skip this section and start coding, you can deploy the pattern to TakeShape to instantly create your API.
First, we'll create the data we'll use to power our lookbook. We'll start by making a project in TakeShape, then connecting it to Shopify. Finally, we'll model some content.
If we don't already have a TakeShape account, it's free to sign up and create projects on the Developer plan!
We'll start by creating a new, blank project. Again, we can name this whatever we want, but here we'll call it "Shopify Lookbook". After creating our project we'll be taken to the setup screen.
Connect to Shopify
Since we want to use data from Shopify, let's connect our TakeShape project to our Shopify store. From the project menu, select "Services", then use the "Connect Service" button at the top of the list.
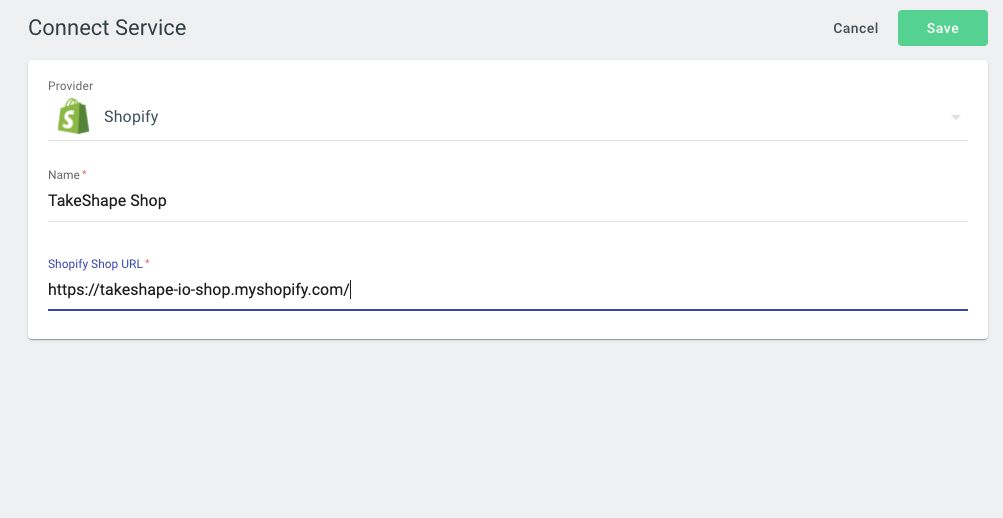
Pick the service we'd like to connect—in this case, Shopify. we'll name our new service and provide our Shopify store's URL. When we're done, click the Save button.
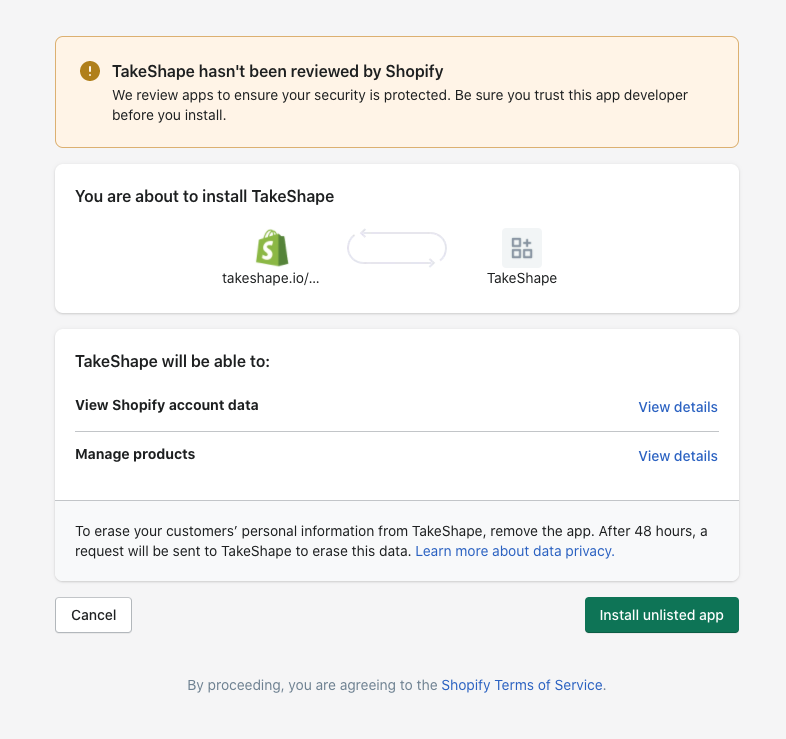
When we connect to Shopify for the first time, we'll be asked to authorize TakeShape as a Shopify App. To approve the installation, click the Install app button.
After we install the app, we'll be taken back to our list of services in TakeShape. Now we'll see our shop is connected! Click on the connected service to see more about it.
Now when we're modeling our content, we can incorporate data from Shopify, too.
Build our lookbook API
Now that Shopify is connected, we'll now be able to use data from Shopify directly in our API. We'll be building a simple API that provides us with Looks: an object that joins an image with a set of Shopify products.
The "Shopify Import" dialog will open. Select all the checkboxes. This will proactively create new shapes, queries and mutations for our API and do an initial import of all of our related Shopify data.
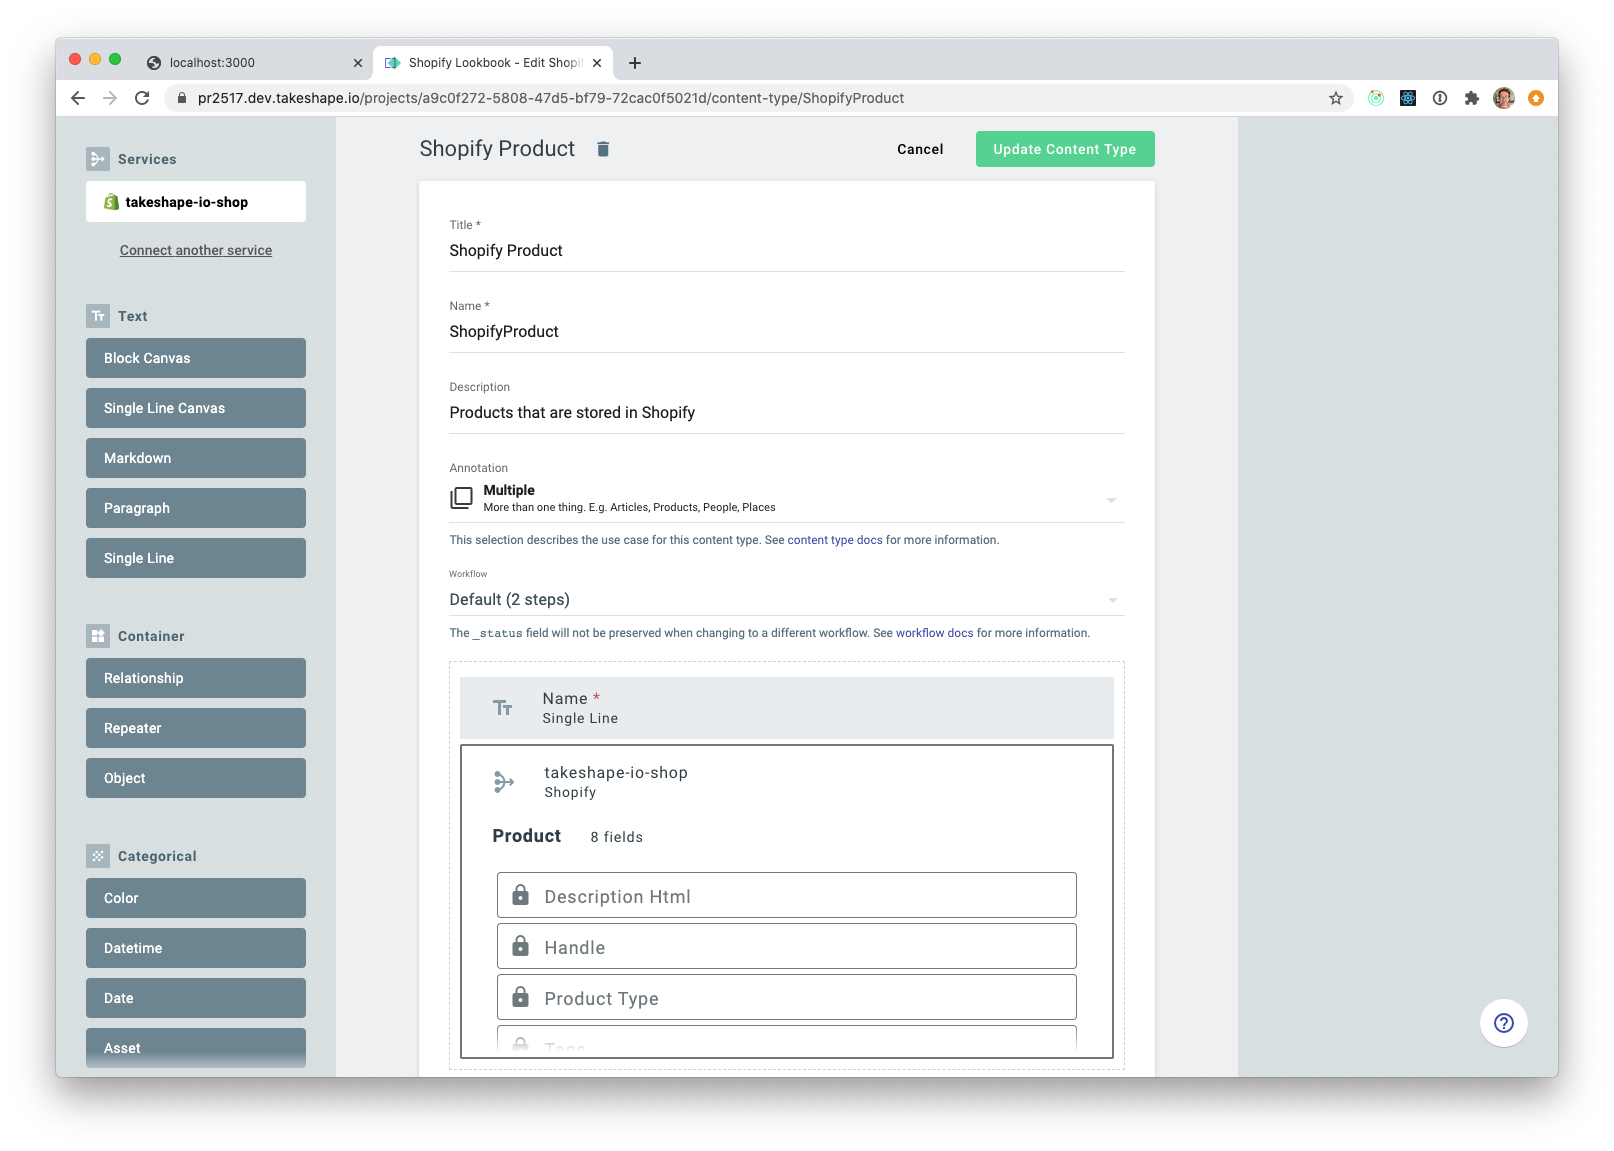
Our Shopify products should be pulled right into our project. If they aren't, go ahead and create new Product entries in TakeShape for each Shopify item we'll feature in the lookbook.
Next, navigate to the "Schema" page and create a Look shape. We'll add three fields to this new shape:
- An optional Paragraph text field that holds a description of the look.
- A Relationship field that connects to the Product shape we just made.
We'll save the new object when we're done, then start creating looks for our book! By the end, we'll have three looks, each of which is associated with two products.
Now that we have our TakeShape project created, connected to Shopify, and combined our Shopify products with data, we have an API to power our lookbook project.
Building the lookbook with Next.js and TakeShape
If you want to skip this step, simply use our GitHub template, then either clone it to your local machine or deploy it straight to Vercel
To build our lookbook, we'll quickly scaffold out a new Next.js project, set up data fetching from TakeShape on our homepage, and then create some components to render out our data. Let's get going!
Scaffold our Next.js project
First, we'll quickly scaffold a new Next.js project using Create Next App.
In our terminal, we run npx create-next app. You can name our project whatever you'd like, but for the sake of clarity here we'll call this project next-shape-shop.
When the CLI successfully creates our project, it will suggest that we enter the project and try running the dev server. Let's try it
cd next-shape-shop
npm run dev
If we open our browser and navigate to http://localhost:3000/, we should see the Next.js getting started page.
We may also notice that Create Next App initializes a new Git repo for our project and records the current state to an initial commit. As we build out our site, we'll save our progress with commits.
Create an API key and .env.local file
Next, we'll create an API key. Pick "API Keys" from the list of setup steps. Use the "New API Key" button to create a new API key with "Dev" permissions. Copy the API Key after it's created.
Create a .env.local file in our Next.js project and add a TAKESHAPE_TOKEN secret to it:
TAKESHAPE_TOKEN={paste API key here}Then, look for the API Endpoint to the right of the setup steps. we can copy it in one click, then paste it into our .env.local as:
TAKESHAPE_ENDPOINT={paste endpoint here}Create a client for querying TakeShape
Now that we have an endpoint and token, we can create a takeshape.config.js file in the root of our Next.js project with the following code:
export { getImageUrl } from "@takeshape/routing";

export class Client {
  constructor(endpoint, token) {
    this.token = token;
    this.endpoint = endpoint;
  }
  async graphql(query, variables) {
    const res = await fetch(this.endpoint, {
      method: "POST",
      headers: {
        "Content-Type": "application/json",
        Authorization: `Bearer ${this.token}`,
      },
      body: JSON.stringify({ query, variables }),
    });
    return await res.json();
  }
}

export default new Client(
  process.env.TAKESHAPE_ENDPOINT,
  process.env.TAKESHAPE_TOKEN
);
We'll see that this gives us a thin Client that we can use make queries against our TakeShape project's GraphQL API. You'll also want to install the @takeshape/routing library so we can render images saved in TakeShape:
npm install @takeshape/routingNow we're ready to start incorporating TakeShape data into our Next.js project!
Fetch data for the homepage with GraphQL
Open up the pages/index.js that was created during scaffolding. First, we'll add a getStaticProps data fetching query to the file. This is a special function that Next.js uses at build time to fetch and load remote data.
The getStaticProps function in our pages/index.js should look like this:
import TakeShape from "../takeshape.client";

export async function getStaticProps() {
  const res = { props: {} };
  try {
    const query = `
      fragment image on Asset {
        title
        description
        path
      }

      fragment product on Product {
        _id
        name
        image {
          ...image
        }
        productId: takeshapeIoShopId
        product: takeshapeIoShop {
          title
          variants(first: 1) {
            edges {
              node {
                price
              }
            }
          }
        }
      }

      query HomepageQuery {
        looks: getLookList {
          items {
            _id
            name
            text
            photo {
              ...image
            }
            products {
              ...product
            }
          }
        }
      }
    `;
    const data = await TakeShape.graphql(query);
    res.props = data;
    return res;
  } catch (error) {
    console.error(error);
    res.props = { errors: [error] };
  }
  return res;
}
What we're doing here is:
- declaring our GraphQL query that fetches a list of the Look objects we created in TakeShape
- using the TakeShape client we added to perform and return the query data
- handling any errors that occurred during the query
- finally, returning an object with a props value containing either our query results, or an
errorsproperty
Next, we'll update the existing Home component to load the props and render our list of Looks. The entire file /pages/index.js should look like this:
import Error from "next/error";
import TakeShape, { getImageUrl } from "../takeshape.client";
import styles from "../styles/Home.module.css";

const Look = ({ photo, text, products }) => {
  return (
    <div className={styles.look}>
      <div className={styles.photo}>
        <img src={getImageUrl(photo.path, { w: 900, h: 1200, fit: "crop" })} />
      </div>
      <div className={styles.details}>
        <p className={styles.text}>{text}</p>
      </div>
    </div>
  );
};

export default function Home(props) {
  const { data, errors } = props;
  if (errors) {
    return <Error statusCode={500} />;
  } else if (!data) {
    return <Error statusCode={404} />;
  }
  const looks = data.looks.items;
  return (
    <div className={styles.container}>
      {looks.map((look) => (
        <Look key={look._id} {...look} />
      ))}
    </div>
  );
}

export async function getStaticProps() {
  const res = { props: {} };
  try {
    const query = `
      fragment image on Asset {
        title
        description
        path
      }

      fragment product on Product {
        _id
        name
        image {
          ...image
        }
        productId: takeshapeIoShopId
        product: takeshapeIoShop {
          title
          variants(first: 1) {
            edges {
              node {
                price
              }
            }
          }
        }
      }

      query HomepageQuery {
        looks: getLookList {
          items {
            _id
            name
            text
            photo {
              ...image
            }
            products {
              ...product
            }
          }
        }
      }
    `;
    const data = await TakeShape.graphql(query);
    res.props = data;
    return res;
  } catch (error) {
    console.error(error);
    res.props = { errors: [error] };
  }
  return res;
}
Also it's imported CSS module, styles/Home.module.css, will look like this:
.container {
  min-height: 100vh;
  padding: 0 0.5rem;
  display: flex;
  flex-direction: column;
  justify-content: center;
  align-items: center;
  scroll-snap-type: y proximity;
}

.container h1 {
  margin: 2em;
}

.look {
  width: 100%;
  max-width: 80em;
  margin: 1em auto;
  padding: 1em;
  display: flex;
  flex-wrap: wrap;
  justify-content: center;
  scroll-snap-align: start;
}

.look:nth-of-type(even) {
  flex-direction: row-reverse;
}

.photo {
  flex: 1 1 28em;
  max-width: 64em;
  margin: 1em;
}

.photo img {
  display: block;
  width: 100%;
  border-radius: 4px;
}

.details {
  flex: 1 1 24em;
  margin: 3em;
  display: flex;
  flex-direction: column;
  justify-content: space-between;
}

.text {
  font-family: "Georgia", "serif";
  font-size: 1.2em;
  line-height: 1.6;
}
You should notice a few things about this code:
- If there are any errors, or our data is missing, we'll render Next's
Errorcomponent instead of our homepage. - We're defining a component named
Lookseparately from ourHomecomponent. Separating components will make it easier to refactor our code later on. For instance, if we want to add standalone pages for each Look, we could add a new page that reuses this component. - When we render each Look's image, we're generating a
srcproperty using thegetImageUrlmethod from TakeShape. This method will convert the path of an image stored in TakeShape to the full URL of the image on TakeShape's image CDN.
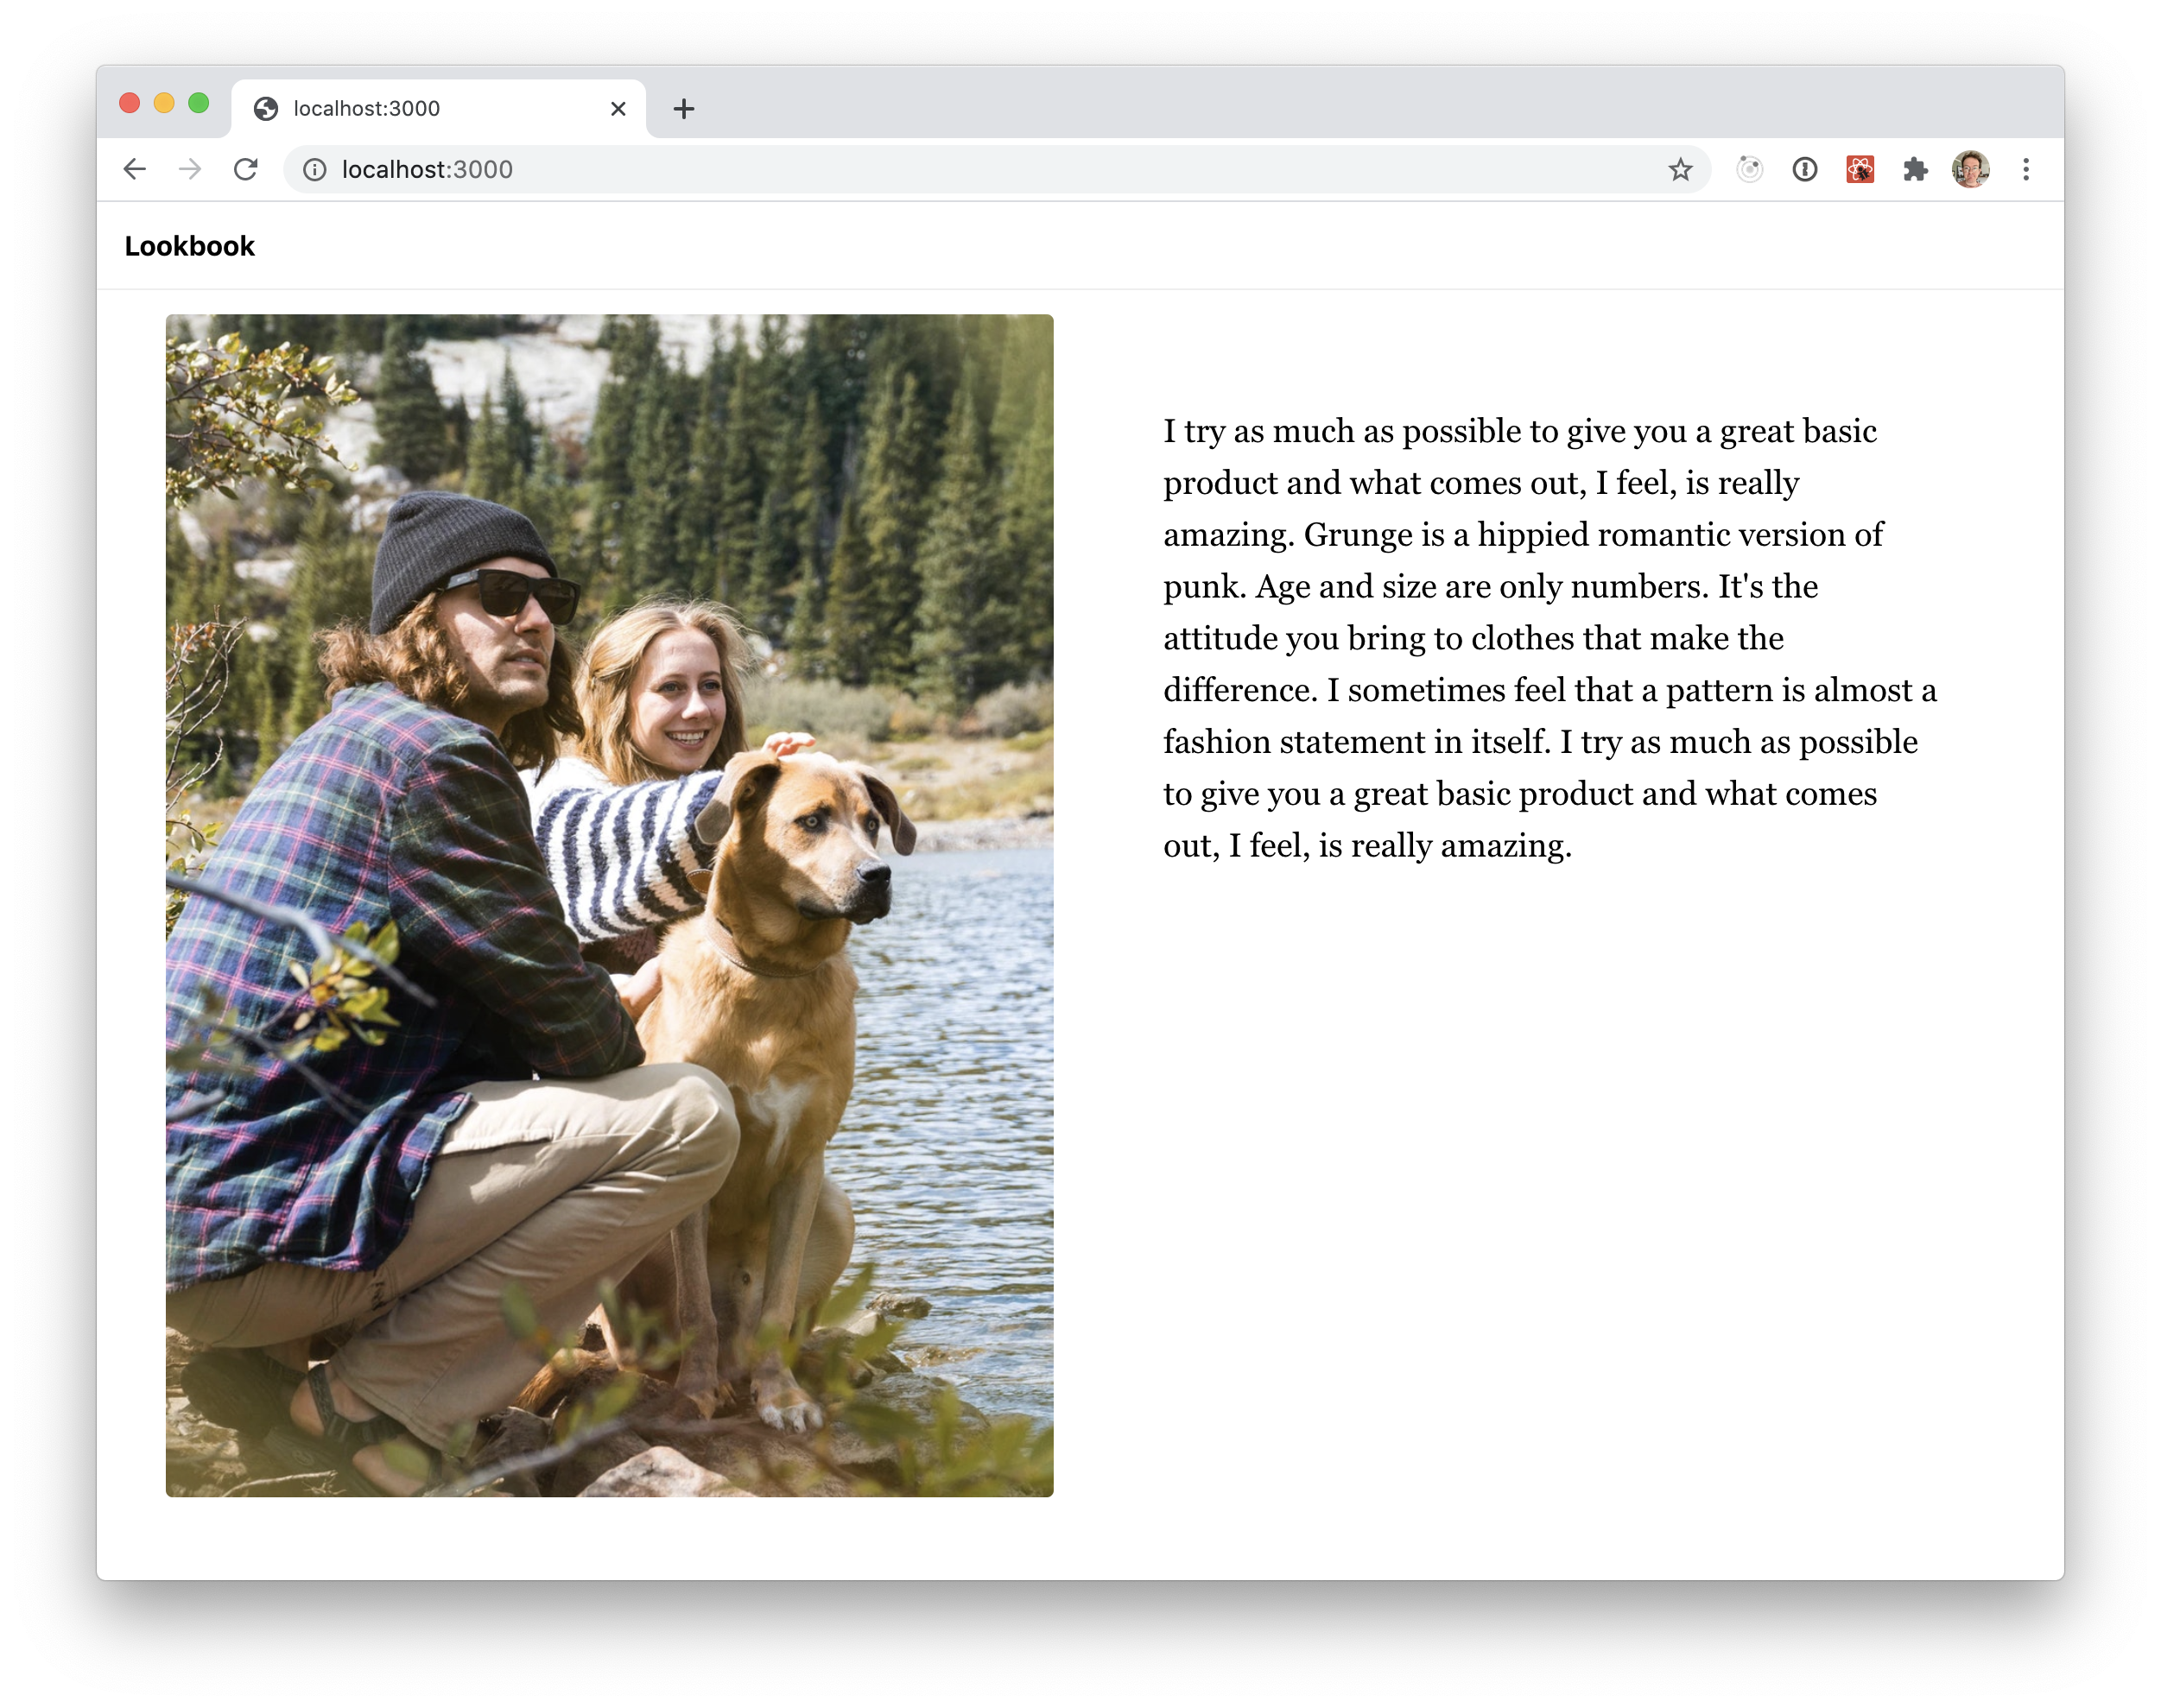
Now when we run npm run dev and visit http://localhost:3000, we should see our Looks rendered out on the homepage!
Create pages for each product
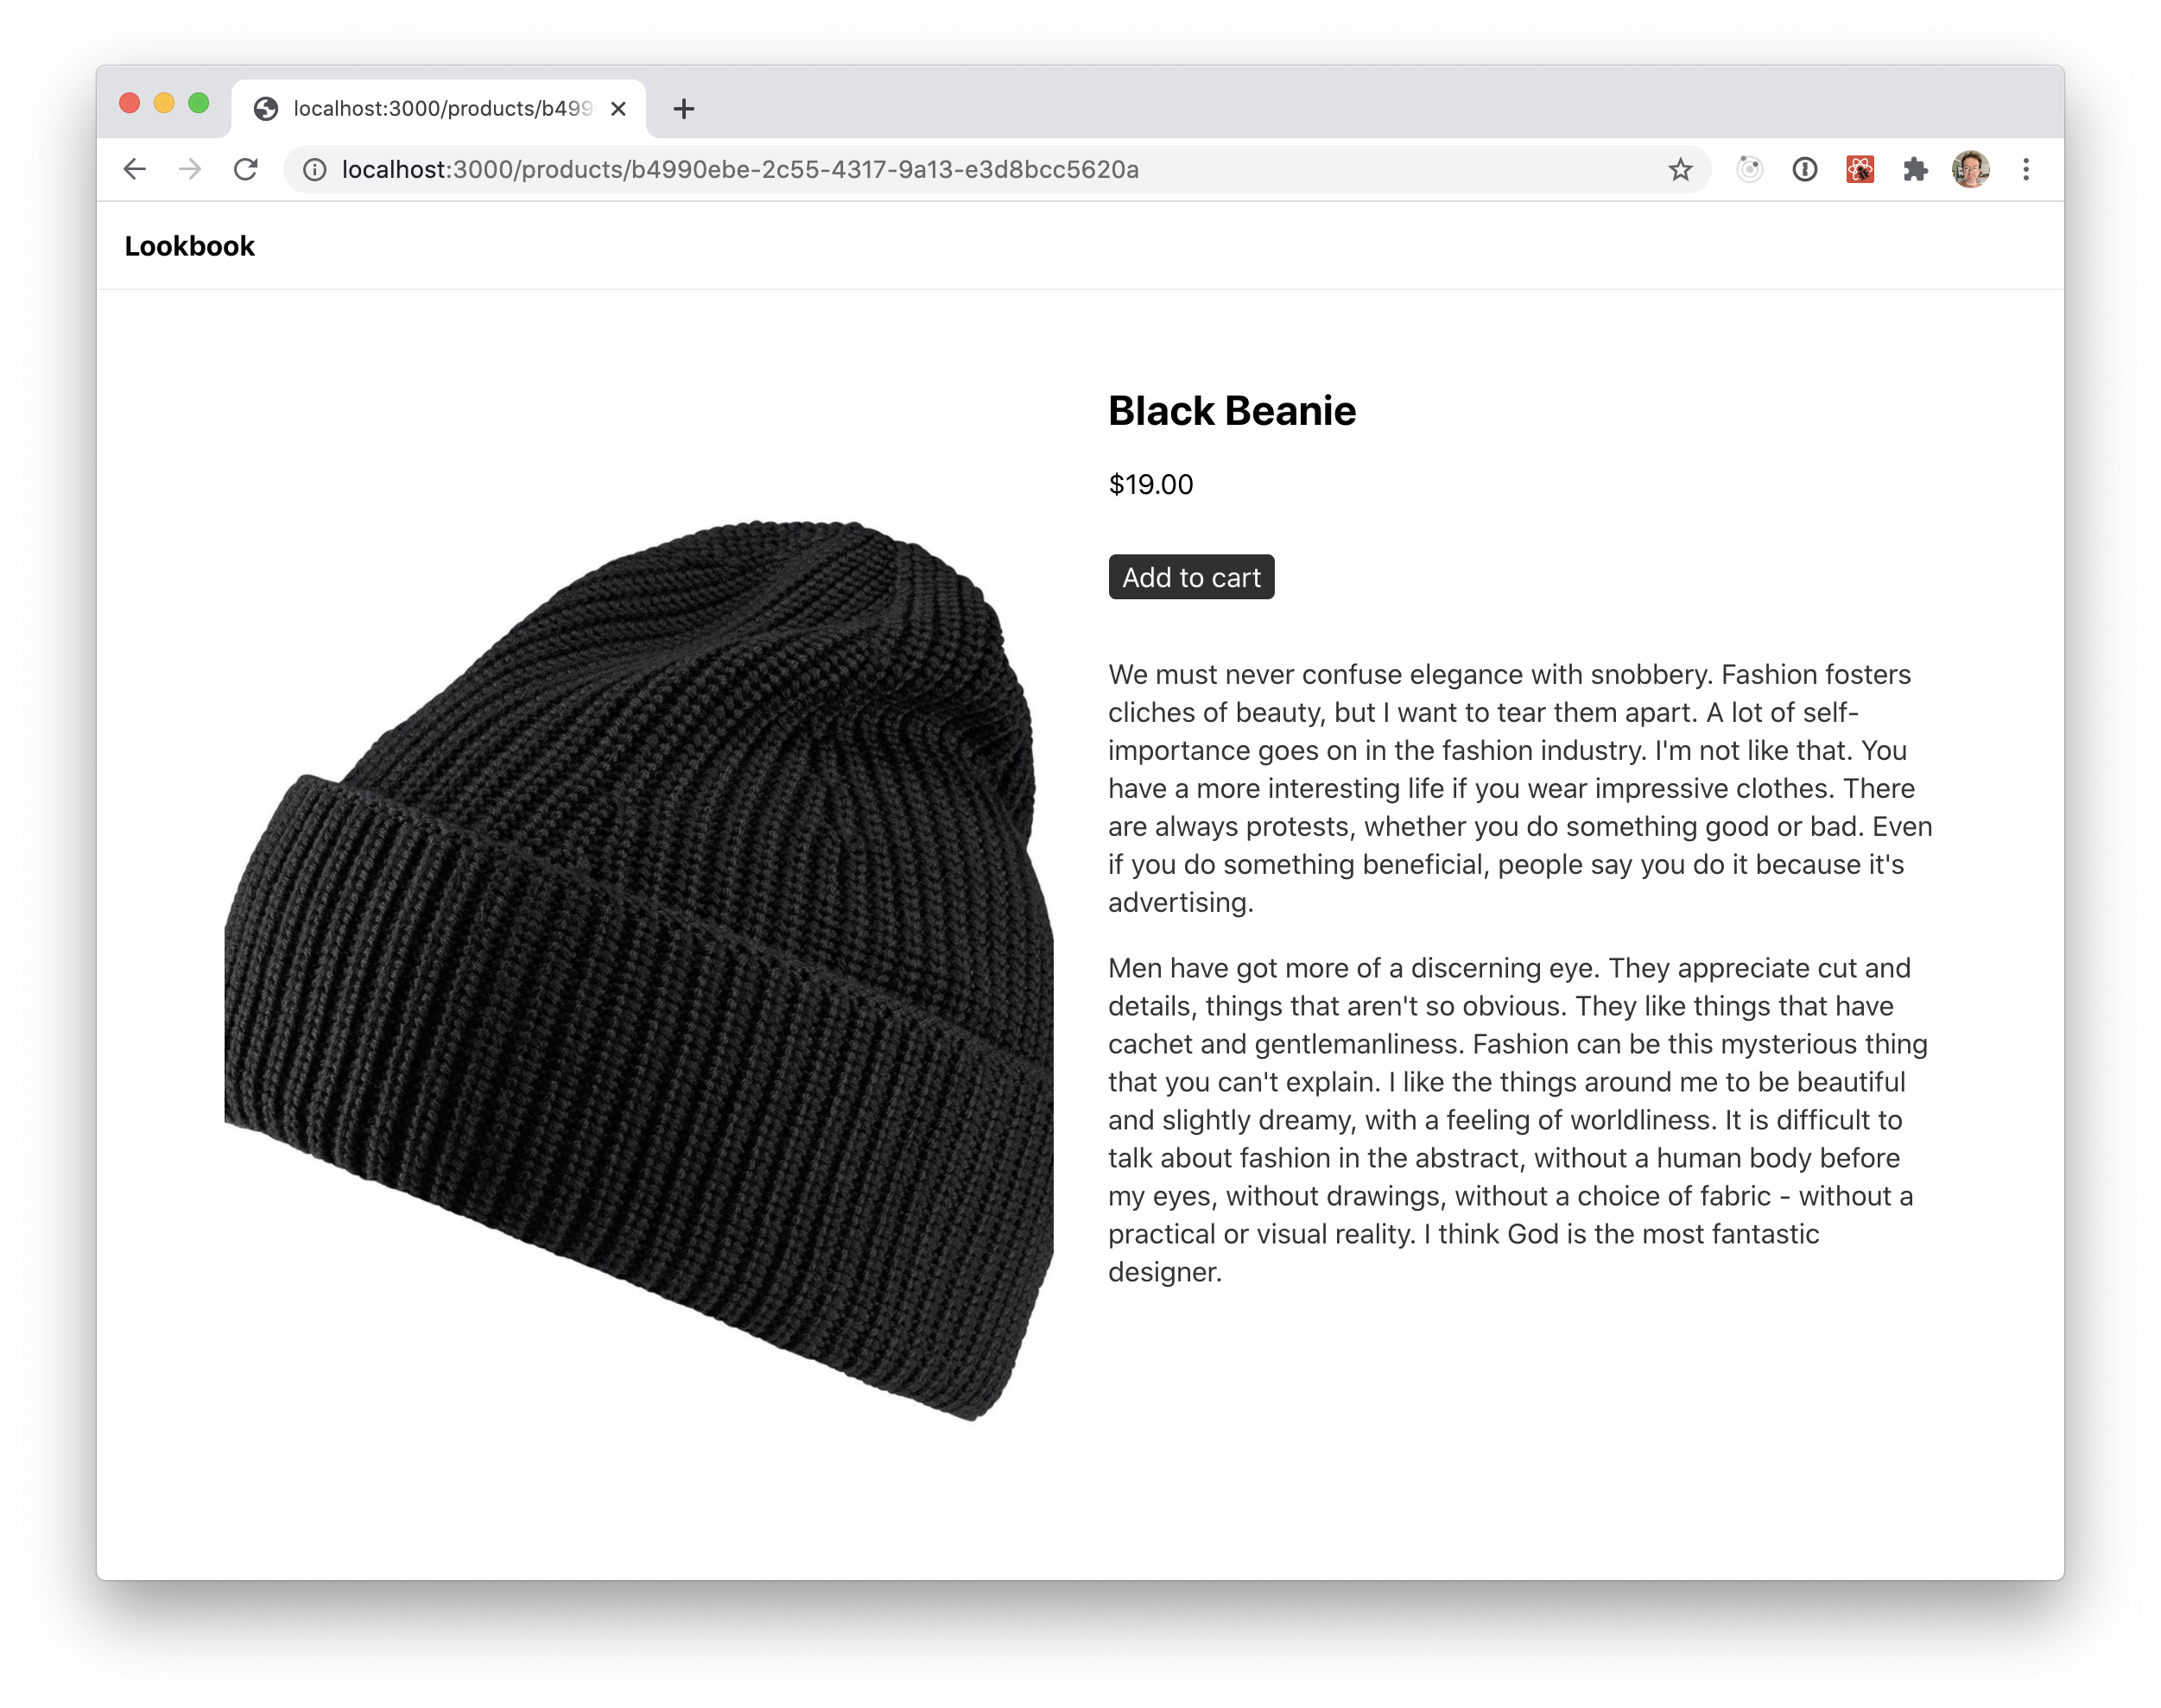
Our looks have links to products, but those links don't lead anywhere! We'll need to create standalone pages for each product in our shop.
We'll use Next's dynamic routing and static data fetching to generate a page for each of our products. To start, we'll create the file pages/products/[id].js that looks like this:
import Error from "next/error";
import TakeShape, { getImageUrl } from "../../takeshape.client";
import styles from "../../styles/Product.module.css";

const Product = ({ image, product, productId }) => {
  const { title } = product;
  return (
    <div className={styles.container}>
      {image && (
        <div className={styles.image}>
          <img
            src={getImageUrl(image.path, { w: 800, h: 1200, fit: "crop" })}
          />
        </div>
      )}
      <div className={styles.text}>
        <h2>{title}</h2>
        <div
          className={styles.description}
          dangerouslySetInnerHTML={{ __html: product.descriptionHtml }}
        />
      </div>
    </div>
  );
};

export default function ProductPage(props) {
  const { data, errors } = props;
  if (errors) {
    return <Error statusCode={500} />;
  } else if (!data) {
    return <Error statusCode={404} />;
  }
  return <Product {...data.product} />;
}

export async function getStaticProps({ params }) {
  const { id } = params;
  const res = { props: {} };
  try {
    const query = `
      query singleProduct($id: ID!) {
        product: getProduct(_id: $id) {
          image {
            path
            title
            description
          }
          productId: takeshapeIoShopId
          product: takeshapeIoShop {
            title
            descriptionHtml
            variants(first: 1) {
              edges {
                node {
                  price
                }
              }
            }
          }
        }
      }
    `;
    const variables = { id };
    const data = await TakeShape.graphql(query, variables);
    res.props = data;
    return res;
  } catch (error) {
    console.error(error);
  }
  return res;
}

export async function getStaticPaths() {
  let paths = [];
  try {
    const query = `
      query {
        products: getProductList {
          items {
            _id
          }
        }
      }
    `;
    const res = await TakeShape.graphql(query);
    const createPath = (item) => ({ params: { id: item._id } });
    paths = res.data.products.items.map(createPath);
  } catch (error) {
    console.error(error);
  }
  return { paths, fallback: true };
}
Again, we'll also create a CSS module file for the Product page component at styles/Product.module.css:
.container {
  display: flex;
  max-width: 64em;
  margin: 2em auto;
}

.image {
  flex: 1 1 16em;
  padding: 1em;
}

.image img {
  display: block;
  width: 100%;
  border-radius: 4px;
}

.text {
  flex: 1 1 16em;
  padding: 1em;
}

.description {
  line-height: 1.4;
  opacity: 0.8;
  margin: 2em 0;
}
This looks similar to how we set up the homepage. We have our page component (which makes use of a Product component we will add in just a moment!). We have our getStaticProps method that queries TakeShape using the id parameter defined in the route.
Now that we have a dynamic route parameter, we export a getStaticPaths function, too. This gives Next a list of routes to fetch data for when it builds our site. To fill out this list of routes, all we want to do is query TakeShape for a list of our Product object IDs, then export them in the format Next expects. We also set the fallback flag to true, so that any new products we add to our shop can be get pages without rebuilding the entire site.
Now, using the ID from any product in TakeShape (found in the URL path), we can check out the product pages running on our development site by visiting http://localhost:3000/products/[id]. Pretty slick!
Display products for each look
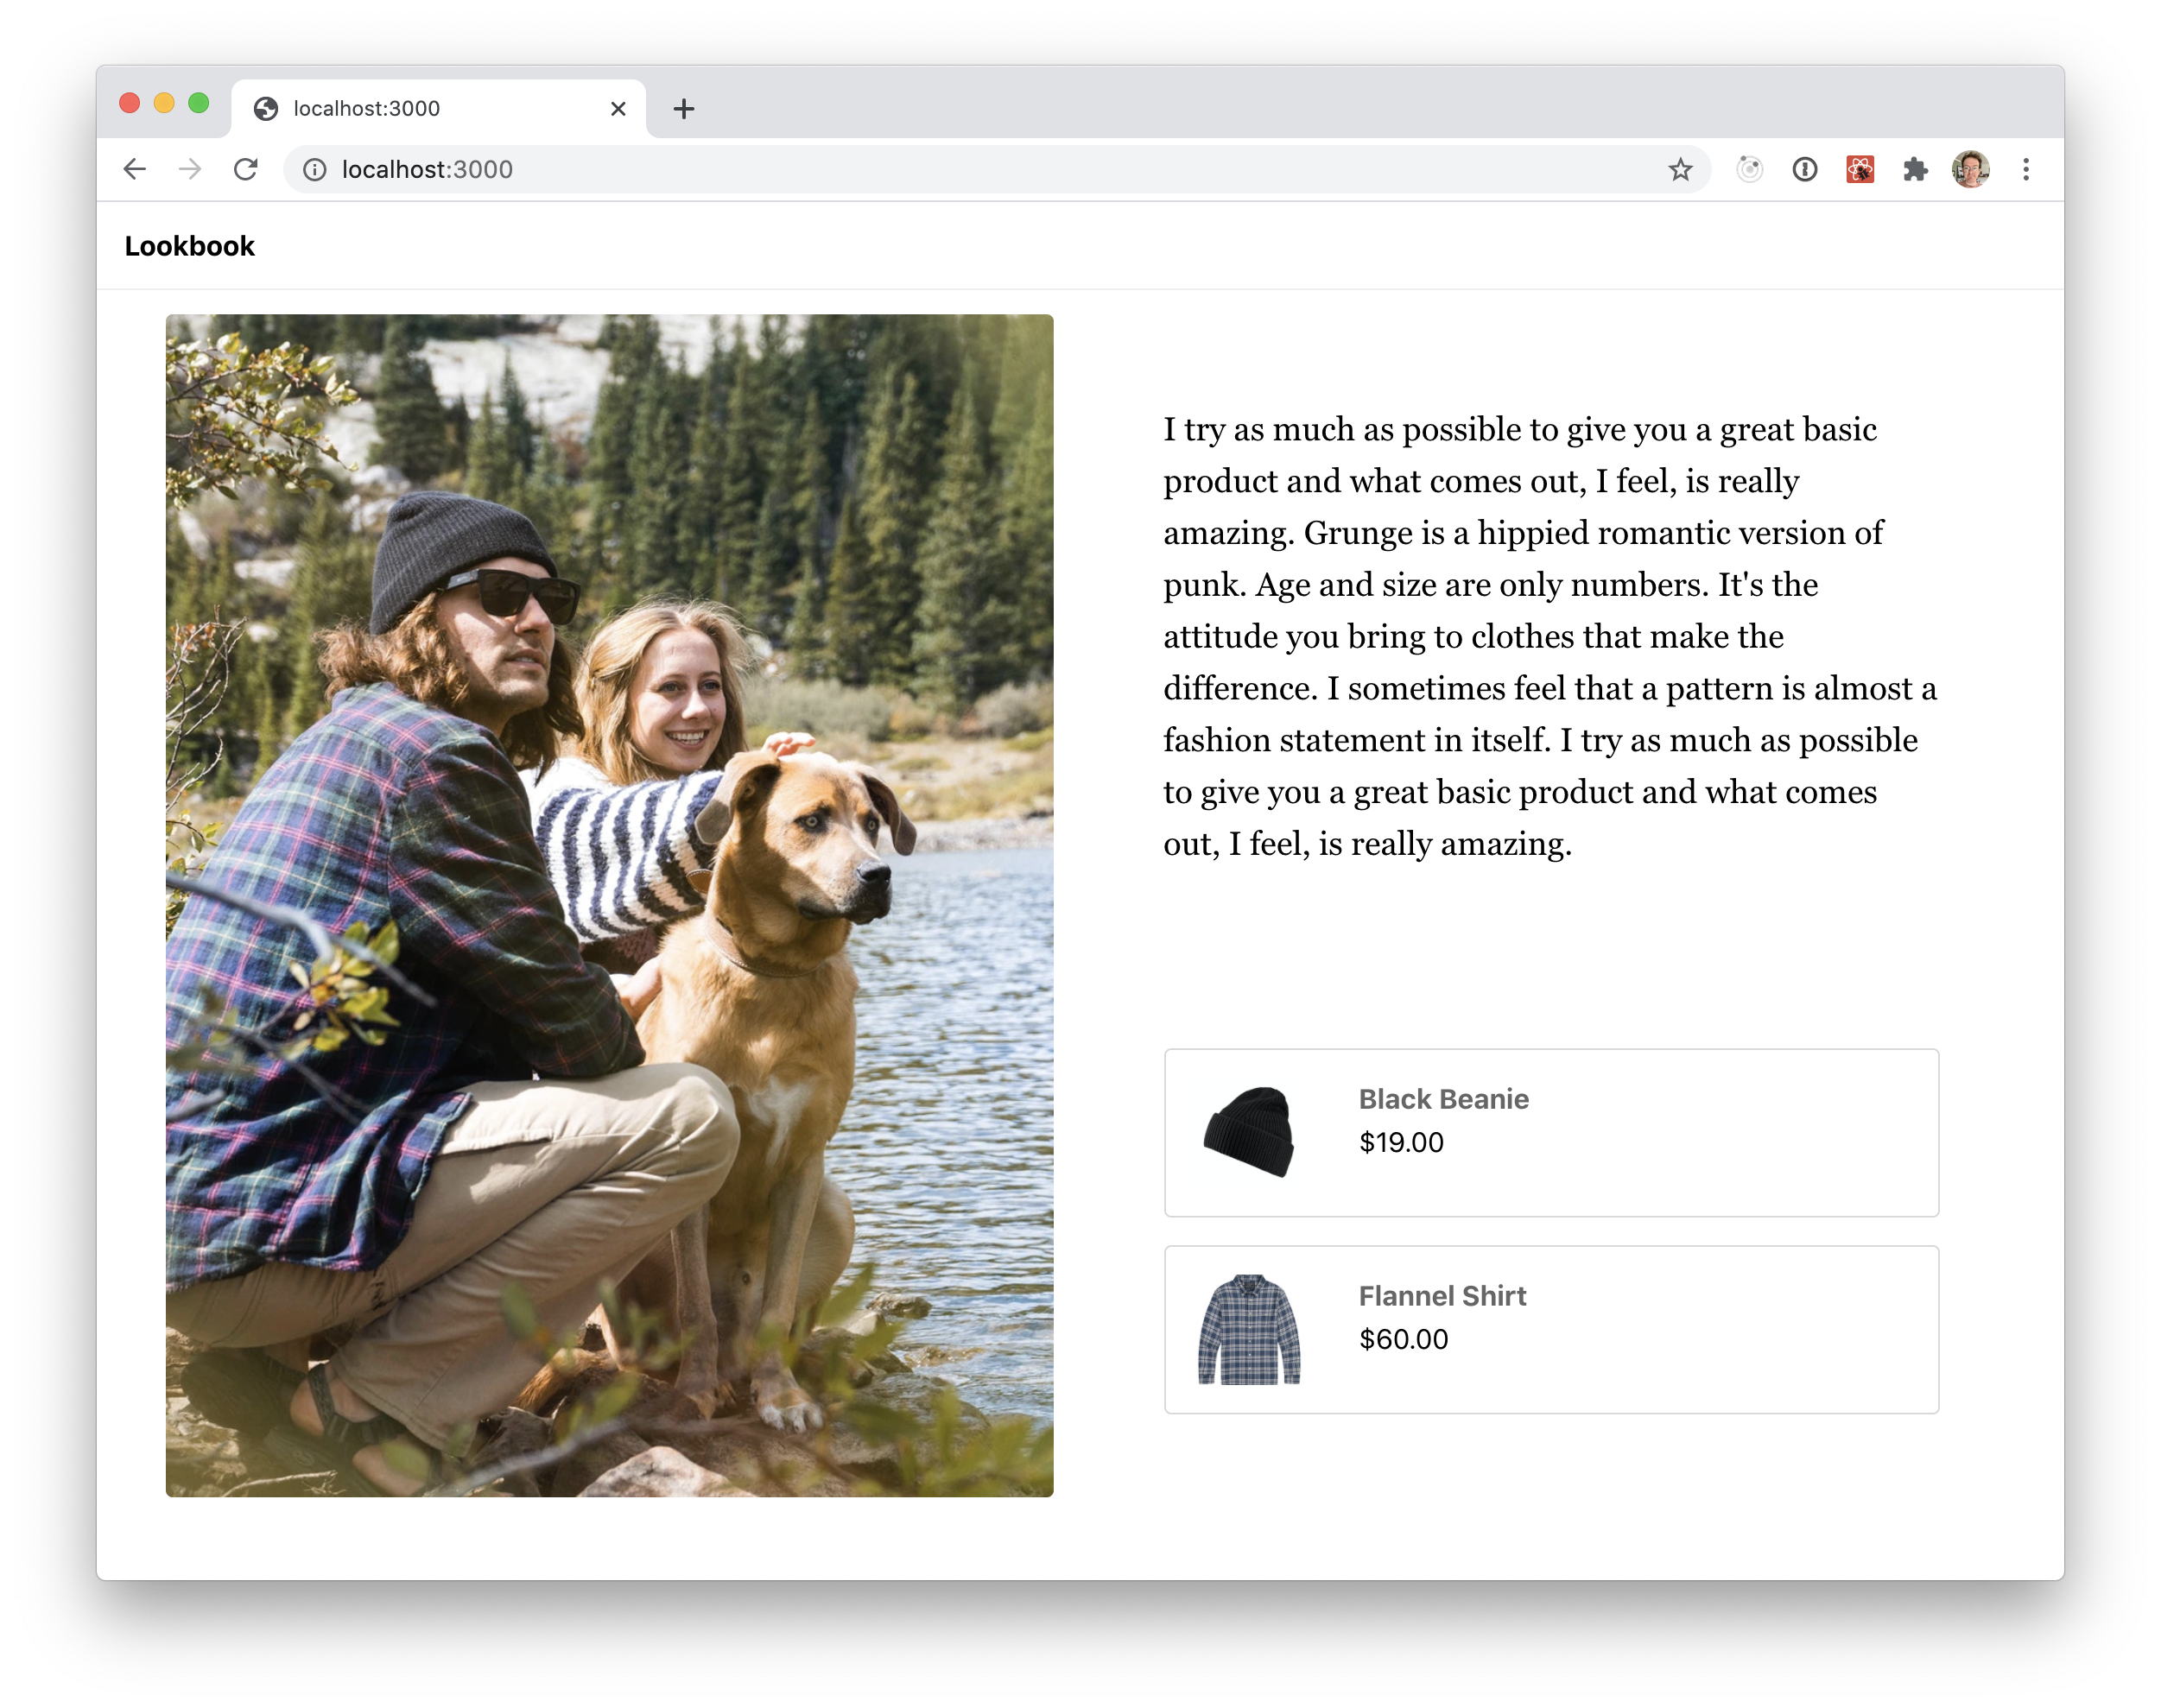
We'll now tie these two pages together by creating rich links between our Looks and our product pages. Our homepage already has a simple link to each product, but we can enhance it with an image thumbnail, and the product price.
First, we'll create a new ProductCard component in components/ProductCard.jsx:
import Link from "next/link";
import { getImageUrl } from "@takeshape/routing";
import styles from "../styles/ProductCard.module.css";

const ProductLink = ({ id, children }) => (
  <Link href={`/products/${id}`}>
    <a className={styles.link}>{children}</a>
  </Link>
);

export function getProductPrice(product) {
  const { variants } = product;
  const firstNode = variants?.edges[0]?.node;
  const price = firstNode?.price;
  return price;
}

const ProductCard = ({ _id, name, image, productId, product }) => {
  const { title } = product;
  const price = getProductPrice(product);
  return (
    <div className={styles.container}>
      {image && (
        <ProductLink id={_id}>
          <img
            className={styles.image}
            src={getImageUrl(image.path, { w: 300, h: 300, fit: "crop" })}
          />
        </ProductLink>
      )}
      <div className={styles.text}>
        <ProductLink id={_id}>
          <p className={styles.title}>{title}</p>
        </ProductLink>
        {price && <p className={styles.price}>${price}</p>}
      </div>
    </div>
  );
};

export default ProductCard;
Again, we'll create a corresponding CSS module at styles/ProductCard.module.css:
.container {
  display: flex;
  flex-direction: row;
  border: 1px solid rgba(0, 0, 0, 0.15);
  border-radius: 4px;
  overflow: hidden;
  align-items: flex-start;
  padding: 0 1em 0 0;
  margin: 1em 0;
}

.cardButton {
  flex: 0 0 auto;
  margin: 1em 0 0;
}

.link:hover {
  color: #333;
}

.link:visited {
  color: #666;
}

.image {
  flex: 0 0 auto;
  max-width: 4em;
  display: block;
  height: auto;
  margin: 1em;
  border-radius: 4px;
}

.text {
  flex: 1 1 auto;
  padding: 1em;
  line-height: 1.6;
}

.title {
  font-weight: bold;
  margin: 0;
}

.price {
  margin: 0;
}
Then, we'll replace the product link in our homepage's Look component with the ProductCard component. In pages/index.js, our Look component will now look like this:
import ProductCard from "../components/ProductCard";

const Look = ({ photo, text, products }) => {
  return (
    <div className={styles.look}>
      <div className={styles.photo}>
        <img src={getImageUrl(photo.path, { w: 900, h: 1200, fit: "crop" })} />
      </div>
      <div className={styles.details}>
        <p className={styles.text}>{text}</p>
        <div className={styles.products}>
          {products.map((product) => (
            <ProductCard {...product} key={product._id} />
          ))}
        </div>
      </div>
    </div>
  );
};
When we save and look back at our running dev project, we'll see that the looks now have an appealing preview of each product.
Add some buy buttons
The last thing we'll add to our project is a basic Add to Cart button component that we can reuse across our product pages and components.
Just like with the ProductCard, we'll make a new component and CSS module named AddToCart. Our file named components/AddToCart.jsx will look like this:
import styles from "../styles/AddToCart.module.css";

function addToCart(products, quantity) {
  const productCount = products.length * quantity;
  alert(
    `Added ${productCount} product${
      productCount !== 1 ? "s" : ""
    } (${products.join(", ")}) to the cart!`
  );
}

const AddToCart = ({ products, label = "Add to Cart" }) => {
  const onClickHandler = () => addToCart(products, 1);
  return (
    <button className={styles.button} onClick={onClickHandler}>
      {label}
    </button>
  );
};

export default AddToCart;
The CSS module styles/AddToCart.module.css will look like this:
.button {
  appearance: none;
  font-family: inherit;
  font-size: inherit;
  color: white;
  background: #303030;
  border: none;
  border-radius: 4px;
  padding: 0.25em 0.5em;
  margin: 1em 0;
  cursor: pointer;
}

.button:hover,
.button:focus {
  opacity: 0.8;
}
Finally, we'll add this new button to our Product and Homepages, passing in the product's ID inside an array. In the product page's Product component and our ProductCard component, we'll import and insert the product's price and Add to Cart button like this:
// imports
import { getProductPrice } from "../../components/ProductCard";
import AddToCart from "../../components/AddToCart";

// then, between the product's title and description, insert:
<p>${getProductPrice(product)}</p>
<AddToCart products={[productId]} />
You might be asking, why are we using an array of products for the prop when we're only passing one in? Why an array? This lets us add an entire Look to a cart, if we want! In the homepage's Look component, we'll insert the Add to Cart under our list of products:
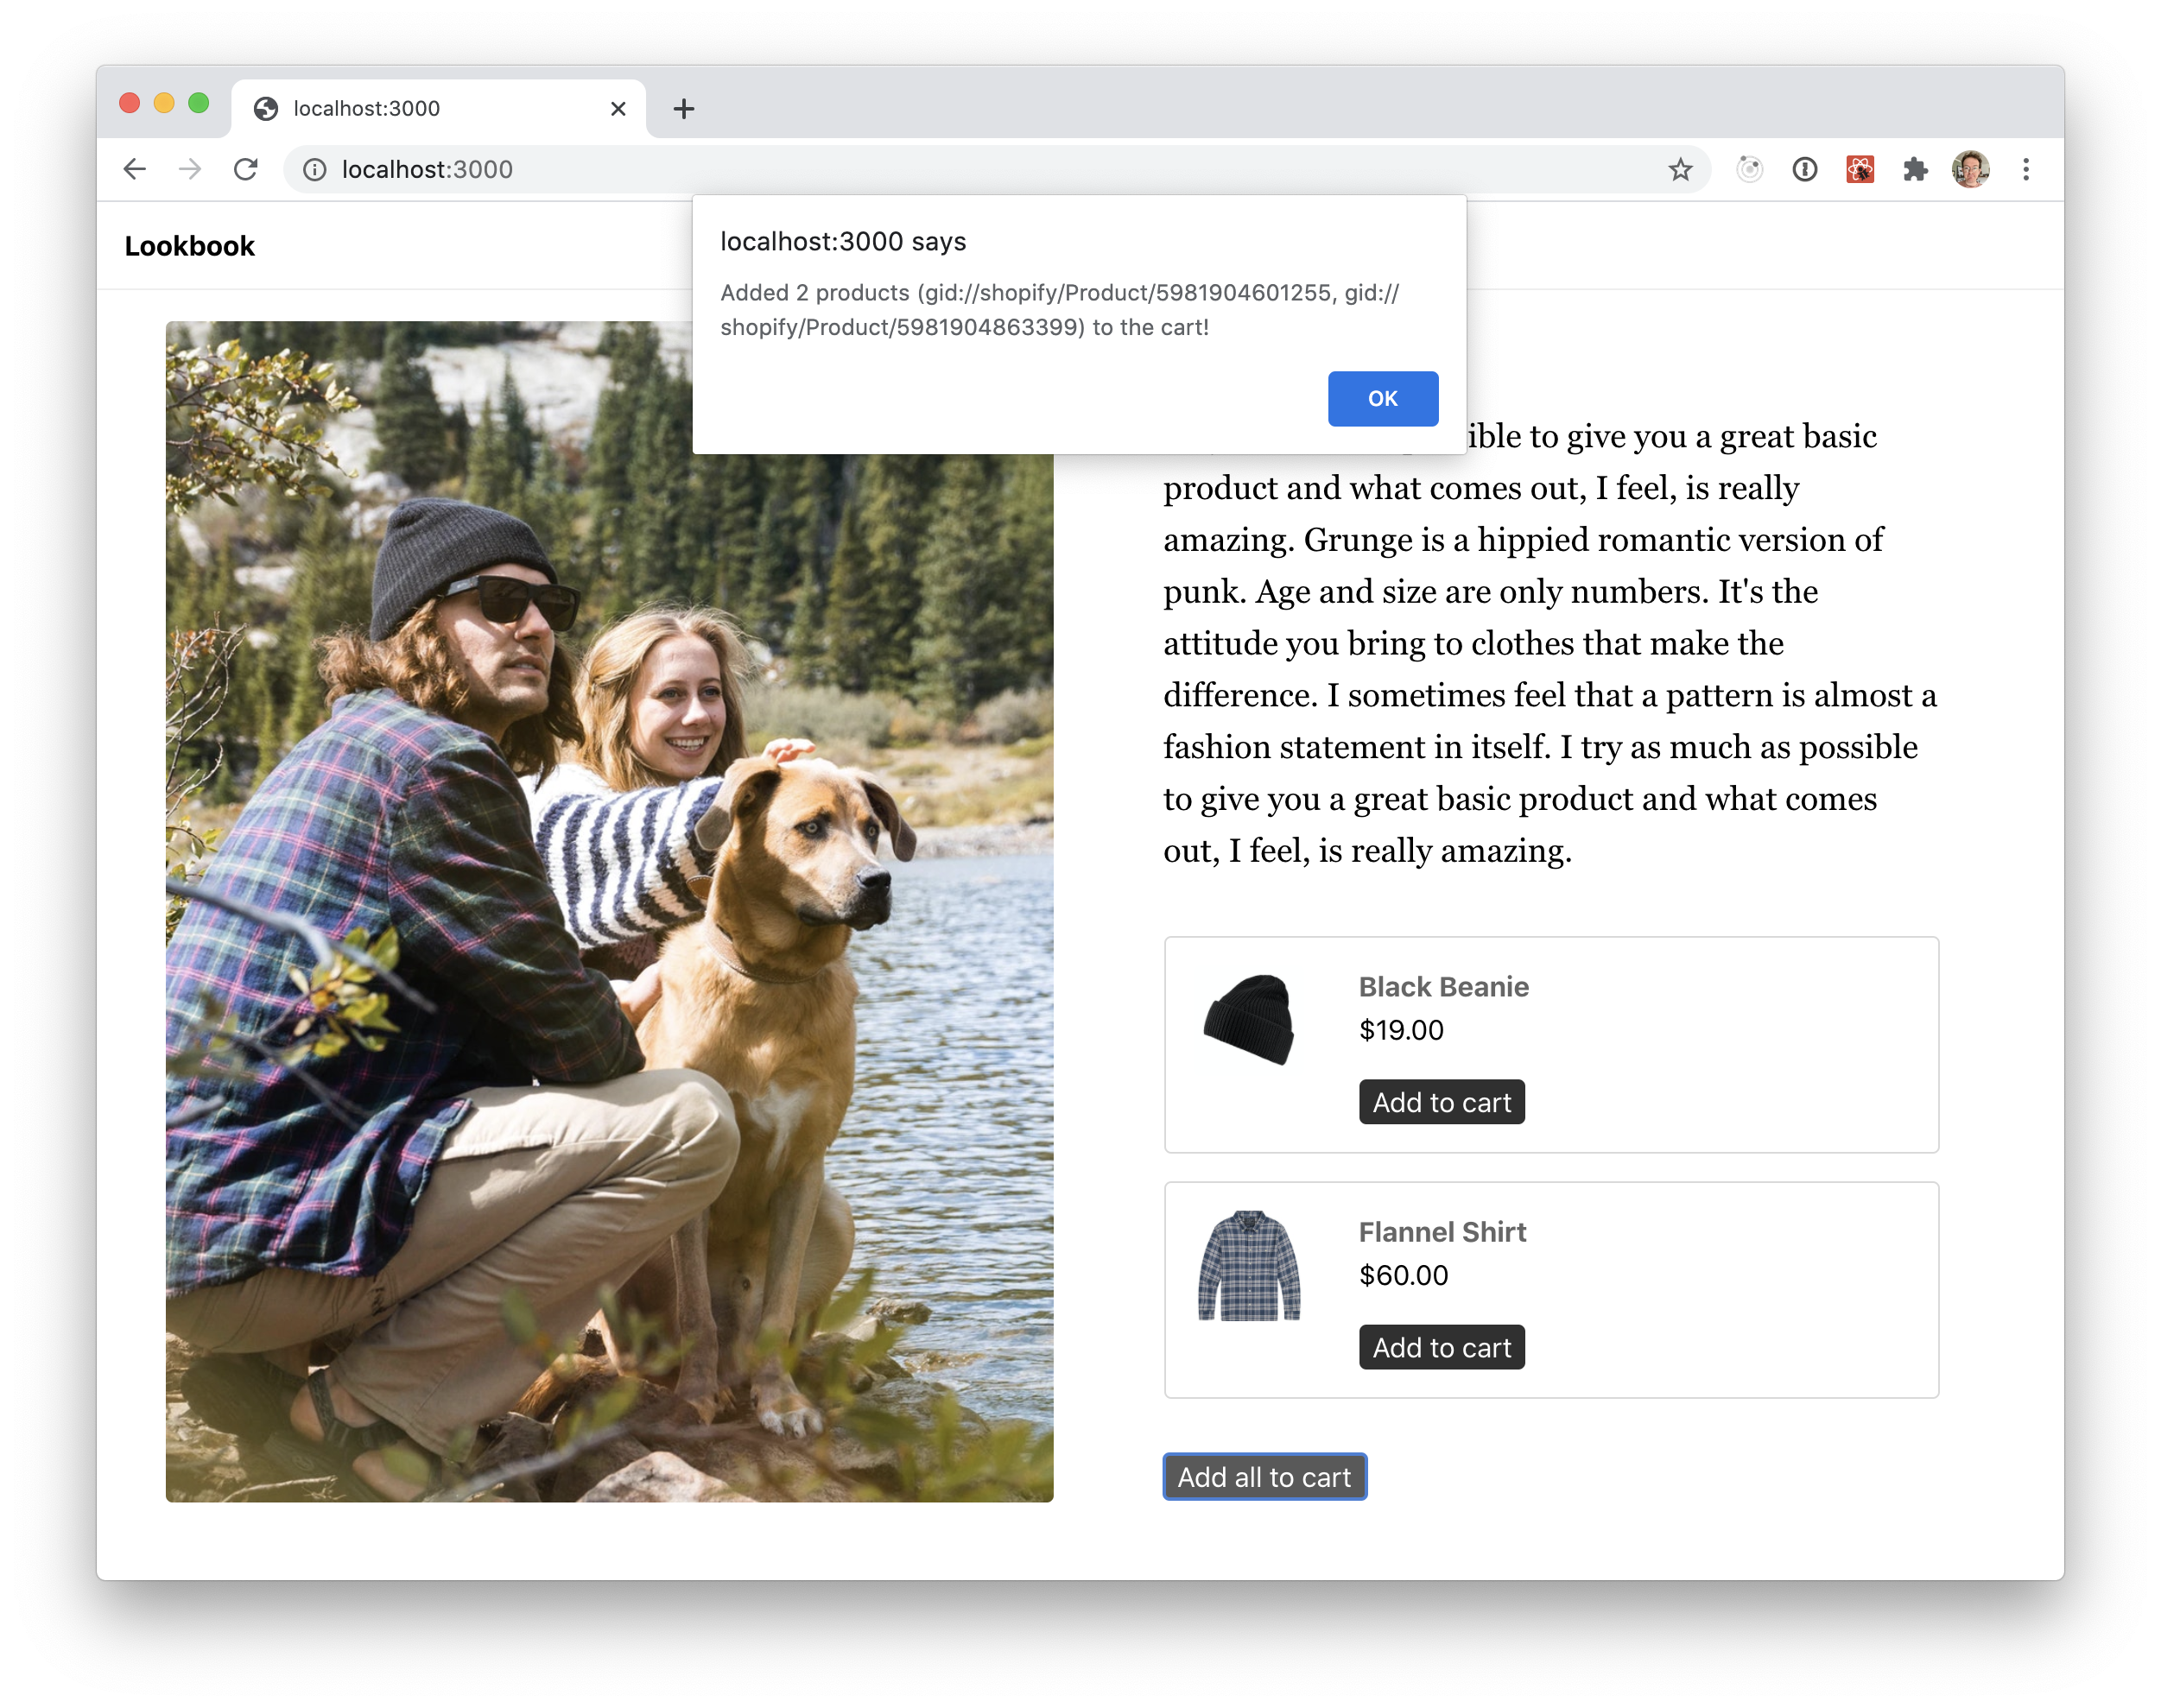
<AddToCart label="Add all to cart" products={products.map((product) => product.productId)} />We'll save and go back to our dev site. We'll see that our site is now peppered with Add to Cart buttons. When we click one, the basic handler tell us which, and how many, products will be added to the cart.
Conclusion
We won't go further into the logic for managing a cart or checking out in this guide, but we'll explore that functionality and creating a checkout with TakeShape and Shopify in a follow-up guide.
In the meantime, keep playing around with and exploring TakeShape's Shopify integration. This is only one example of how powerful it is to combine Shopify's data with content and even other APIs!
If you have any feedback, please go ahead and open an issue on the sample project. You can also email us at contact@takeshape.io or send us a message using the chat tool below.
