How to use TakeShape in your React app
A beginner friendly guide to learn how to use TakeShape in a React app.
There are many ways of adding or managing content in a React app. One is by using a Content Management System (CMS), which is easy to use and allows crafting a new app in no-time.
TakeShape helps to manage content easily with a clean and intuitive interface. It's also a powerful tool for developers since it allows using technologies such as the GraphQL API and Handlebars-style templates.
In this guide, I will first introduce you to TakeShape and then finish up by building a blog from scratch using React JS and TakeShape. So, let's dive in
What is TakeShape?
TakeShape is a set of services that powers Jamstack projects of any size or complexity. It can be used as a CMS or a Static Site generator. In this tutorial, I will use it as CMS to manage blog posts in the React app and use the GraphQL API provided by TakeShape to fetch the articles.
TakeShape vs Markdown/MDX
As a developer, using regular Markdown or the MDX library makes sense because everything is done with code. However, when you have to deal with clients or have high-frequency updates, managing your content with a CMS might be a better choice. TakeShape is easy to set up and it provides an API Explorer that allows interaction with your data via GraphQL.
Prerequisites
To get the most out of this tutorial, you need at least a basic understanding of how React works and how to query data using GraphQL. So if you feel comfortable with these tools, let's get started.
Setting up
You are more than welcome to set up a new app from scratch using Webpack. I will stick with Create React App though since it offers a modern build setup with no configuration.So, let's open the terminal and execute the following command:
npx create-react-app react-takeshape-blogNext, we need to install a couple of dependencies in order to fetch and render data.
yarn add apollo-boost @apollo/react-hooks graphql react-markdown react-router-domOr when using npm
npm install apollo-boost @apollo/react-hooks graphql react-markdown react-router-domIn this post, I will use Apollo Client to interact with the TakeShape GraphQL API. I will also use Markdown to write blog posts on the TakeShape platform. That's the reason why we have such dependencies.
Next, let's structure the project as follows:
├── src
|  ├── components
|  |  ├── Header.js
|  |  ├── Layout.js
|  |  ├── Post.js
|  |  └── PostTemplate.js
|  ├── App.js
|  ├── useRequest.js
|  ├── index.css
|  ├── index.js
├── .env
├── package.json
└── yarn.lock
Here we have a simple file structure. Only thing to notice: the useRequest file is a custom hook that helps fetch data using Apollo Client.
That said, we can now create the articles on TakeShape in the next section.
Create the blog posts using TakeShape
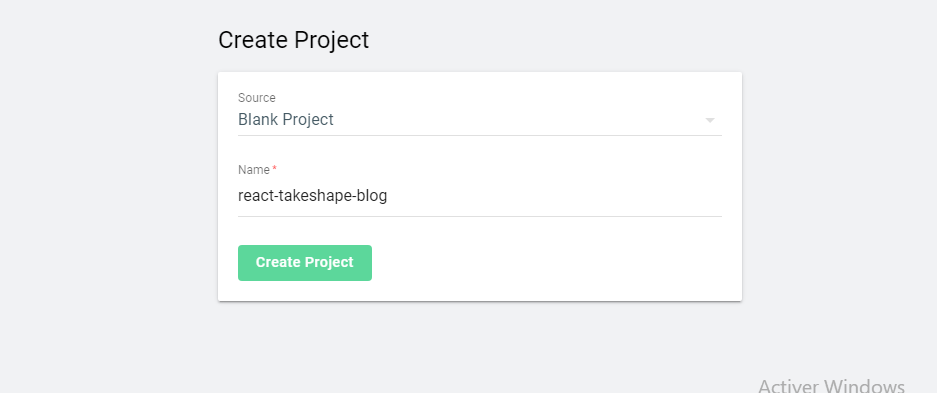
To use TakeShape as a CMS, you will need to create an account (it's free) and then start a new project. You can name it whatever you like, but make sure to select Blank Project since we will do everything from scratch in this tutorial.

create-a-new-project
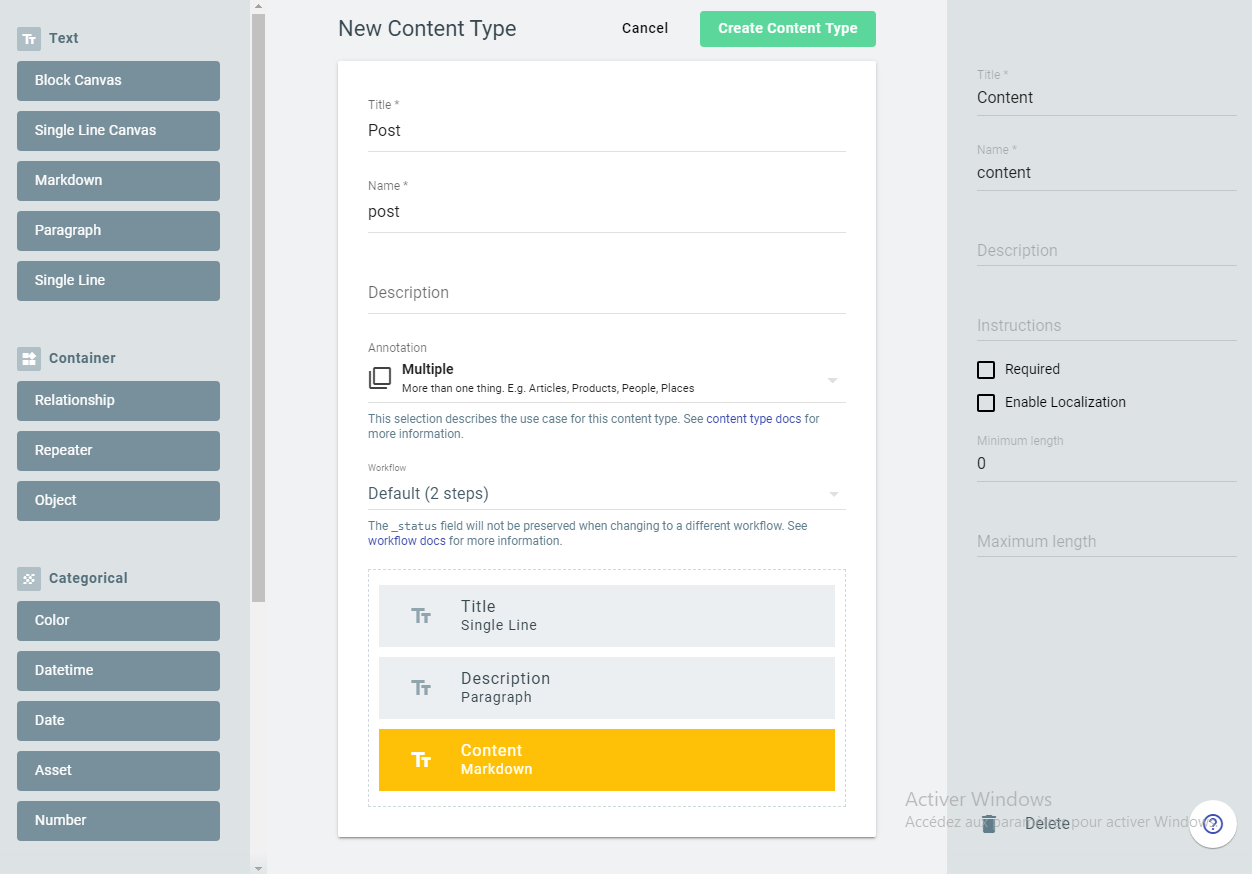
Once the project is created, add a new content type by clicking on the button Create content type. I’ll name it Post. Make sure to use the same name because TakeShape will use the name of the content type to create the GraphQL API.
Next, we need to add fields to the content type. To do so, drag and drop elements to the content type. Now add a title, a description, and the content of the blog posts.

create-content-type
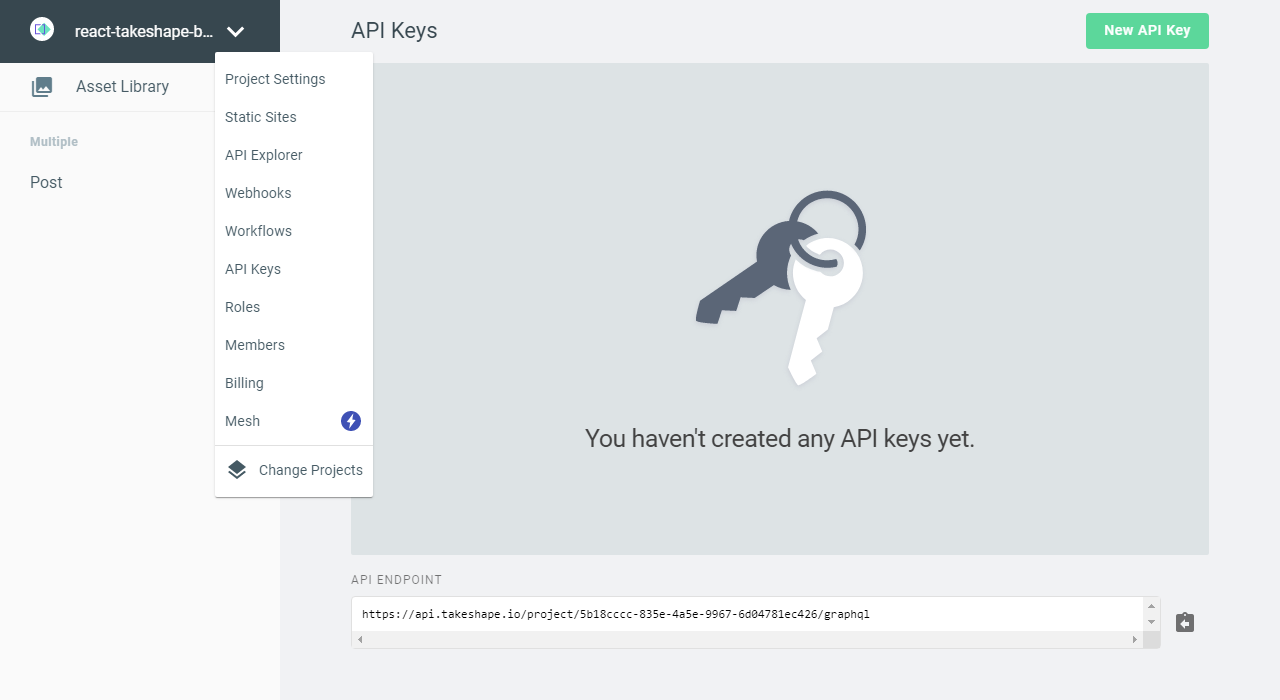
Next, let's add some posts to the content type in order to have data to fetch.To interact with the TakeShape API, you also need to create API keys for your project on the dashboard.

api-keys
We now have the blog posts and the API keys needed to interact with TakeShape. So let's build the React components and start fetching the articles in the next section.
Fetch data using Apollo Client
Create a .env file
.env
API_KEY = your-api-key
PROJECT_ID = your-project-id
These credentials are required to communicate with the TakeShape GraphQL API, so make sure to add yours. By the way, the PROJECT_ID is on the URL copied from TakeShape.
Setting up Apollo with React
index.js
import React from 'react'
import ReactDOM from 'react-dom'
import ApolloClient from 'apollo-boost'
import { ApolloProvider } from '@apollo/react-hooks'

import App from './App'

const client = new ApolloClient({
  uri: `https://api.takeshape.io/project/${process.env.PROJECT_ID}/graphql`,
})

const rootElement = document.getElementById('root')
ReactDOM.render(
  <React.StrictMode>
    <ApolloProvider client={client}>
      <App />
    </ApolloProvider>
  </React.StrictMode>,
  rootElement
)
As you can see here, we start by importing ApolloClient, which creates a new client with the URL provided by TakeShape. Next, pass the client object to Apollo in order to provide the data to the React app.
With that in place, we are now able to send requests to the GraphQL API.
Fetch data with the custom hook
As I said earlier, the useRequest file will serve as a custom hook for fetching data from TakeShape.
useRequest.js
import { useQuery } from '@apollo/react-hooks'

export default function useRequest(gqlQuery, id) {
  const { data, loading, error } = useQuery(gqlQuery, {
    variables: { id: id },
    context: {
      headers: {
        Authorization: `Bearer ${process.env.API_KEY}`,
      },
    },
  })
  return { loading, error, data }
}
The function useRequest receives the GraphQL Query and the id of a single blog post as parameters. It uses the useQuery hook provided by Apollo to fetch the data from TakeShape and returns it to the component.
We can now use the custom hook and create the components to display the data in the next section.
Show the blog posts
Post.js
import React from 'react'
import { Link } from 'react-router-dom'
const Post = ({ article }) => (
<article className='Article'>
<h1>{article.title}</h1>
<p>{article.description}</p>
<Link to={`/single-post/${article._id}`}>Read more →</Link>
</article>
)
export default PostThis component helps us to display the preview of a blog post. It receives the article to show as props.
PostTemplate.js
import React from 'react'
import ReactMarkdown from 'react-markdown'
import gql from 'graphql-tag'
import { useParams } from 'react-router-dom'

import useRequest from '../useRequest'

const GET_POST = gql`
  query getPost($id: ID!) {
    getPost(_id: $id) {
      _id
      title
      content
    }
  }
`

const PostTemplate = () => {
  const { id } = useParams()

  const { loading, error, data } = useRequest(GET_POST, id)
  if (error) return <h1>Something went wrong!</h1>
  if (loading) return <h1>Loading...</h1>
  console.log(data.getPost.articleCover)

  return (
    <article className='Post'>
      <h1>{data.getPost.title}</h1>
      <ReactMarkdown source={data.getPost.content} />
    </article>
  )
}

export default PostTemplate
Here, we have a simple GraphQL query that fetches a single blog post by getting the id of the article from the useParams hook.
Next, we pass GET_POST and the id to the useRequest function and then get back the data to display. And since the body of the article is on markdown format, we need to render it using ReactMarkdown.
App.js
import React from 'react'
import { BrowserRouter as Router, Route } from 'react-router-dom'
import gql from 'graphql-tag'

import useRequest from './useRequest'
import Post from './components/Post'
import PostTemplate from './components/PostTemplate'
import Layout from './components/Layout'
import './index.css'

const GET_BLOG_POSTS = gql`
  {
    getPostList {
      items {
        _id
        title
        description
        content
      }
    }
  }
`

export default function App() {
  const { loading, error, data } = useRequest(GET_BLOG_POSTS)

  if (error) return <h1>Something went wrong!</h1>
  if (loading) return <h1>Loading...</h1>

  return (
    <Router>
      <Layout>
        <Route path='/' exact>
          {data.getPostList.items.map((post) => (
            <Post key={post._id} article={post} />
          ))}
        </Route>
        <Route path='/single-post/:id'>
          <PostTemplate />
        </Route>
      </Layout>
    </Router>
  )
}
Like the PostTemplate.js file, here we also have to define a GraphQL query that fetches all blog posts from TakeShape. But this time, we don't need to provide an id since we query all posts.
Next, we loop through the data and, for each post, we use the Post component to display it. If something went wrong during fetching - an error will be throwing using the `error` state provided by Apollo Client.
Great! With this in place, we can now test if everything is working correctly in the browser by running the following command:
yarn startor
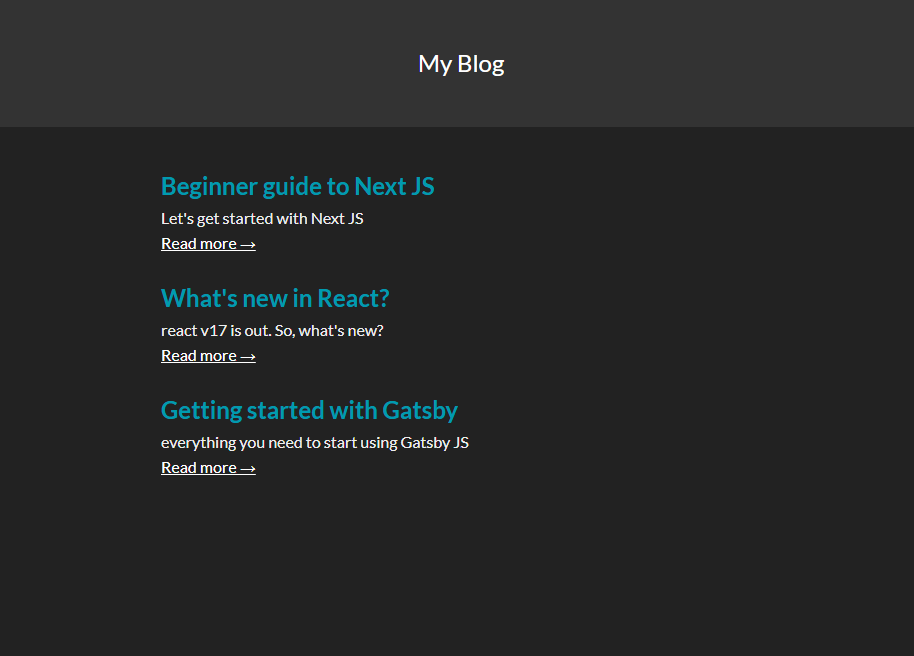
npm startIf everything works as expected, you should be able to see the site here: http://localhost:3000/.

Great! We are now done building a Blog using React and TakeShape.You can preview the finished project here.
Conclusion
Over the course of this article, we have seen how to use TakeShape in a React app. It's beginner-friendly and offers great developer-experience. In the end, TakeShape is like your regular GraphQL API with more ease because you don't have to build the API on your own. It's definitely something to try for your next React project.Thanks for reading!
Resources
Check out these resources to dive deeper into the content of this tutorial:


